Guides
Choosing a Food Thermometer
Food thermometers are used to test potentially hazardous foods during storing, cooking and/or transporting in order to minimise the growth of bacteria. Temperature control is the easiest and most effective way to minimise and control possible toxins. Any foods containing raw or cooked meat, dairy products, seafood, cooked rice or pasta and processed fruit and vegetables are considered potentially hazardous.
The primary thermometry concepts to take into account when choosing a food thermometer are accuracy, resolution, and reproducibility. Secondary factors to consider include range, speed, durability and the environment in which the unit will be used. Subsequently, it is important to determine the appropriate type of thermometer required as they are made to measure different types of physical characteristics.
Any slight increase or decrease in temperature can have a profound effect upon the growth of bacteria. Electronic thermometers with digital displays make it easy to measure temperature within a tenth of degree or less. There are valuable features in today’s thermometers that allow the user to view, record and manipulate the measurements taken.
A food thermometer is a crucial instrument within any food safety program. Food thermometers come in all shapes and sizes with various usage procedures and additional features. It is important to evaluate each situation to establish which type of thermometer would be most beneficial based on the desired outcome and results.
Primary Thermometry Concepts
Reproducibility, accuracy and resolution, are the foundations upon which all good thermometer technology is built. Each component is equally integral to the overall quality and efficiency of the unit. For example, a thermometer may be accurate with a high resolution but without the assurance of reproducibility the readings are unreliable.

Reproducibility
Employing a universal scale (whether Fahrenheit, Celsius, Kelvin, Rankine or other more obscure scales) makes the establishment of scientific standards achievable. It allows the direct comparison of relative temperature data from place to place and instrument to instrument. For example, a thermometer measuring the ice point of water should read 0°C consistently, otherwise it would make any universal scale adopted meaningless in comparing the relative temperatures of dissimilar materials and environments.
The condition hysteresis is a common challenge to the reproducibility of thermometers. With hysteresis, the physical properties of an instrument are temporarily changed by the process of taking a measurement. It becomes apparent when measuring the same material (eg, ice bath) produces various results. Although more common in bi-metal thermometers, electronic thermometers can also be affected. An extended resting period to allow the physical properties of the instrument to return to normal can sometimes restore accuracy, but often this is only a temporary solution. In accordance with Australian Standards and general best practice it is important that your thermometers are calibrated regularly.
Accuracy
Calibration provides certainty in knowing the true accuracy and measurement traceability of your instrumentation. At Ross Brown Sales, our in-house Temperature Measurement Laboratory can provide a Workshop Calibration Certificate that is carried out using NATA certified reference equipment.
“Drift” is the potential for instruments to lose accuracy over time. Although unavoidable regardless of thermometer type, it is easily counteracted through regular re-calibrations. For electronic thermometers, general best practice suggests calibrations are carried out every 12 months. As technology advances, we depend on more accurate and precise temperature measurements. Electronic thermometers with their own computer circuitry can achieve better results by factoring in such things as the effect of ambient temperature, however separating the temperature sensor (probe) from the temperature calculator (meter) increases the possibility of error and both components need to be regularly calibrated.
Resolution
Thermometer resolution refers to the smallest increment of measurement on an instrument. A thermometer that displays temperature readings with a tenth of a degree resolution means that it will read to the nearest 0.1°C (eg 46.6°C) whereas an instrument with a hundredth of a degree resolution conveys a greater measurement display capability (eg 36.26°C).
Although resolution and accuracy are two separate elements, the two should be thought of as going hand in hand. A thermometer with ±0.05 accuracy would be ineffective if the resolution was only in tenths of a degree. Likewise, it could be misleading for a thermometer with hundredths of a degree resolution to only measure ±1° accuracy.
Some thermometers have an “auto-ranging” feature where the resolution adjusts when measuring above or below a certain temperature. For example, the ETI ThermaQ® Thermometer has a temperature range of -99.9°C to 1372°C and its’ resolution is 0.1°C up to 299°C and then 1°C thereafter (300° to 1372°C).
Secondary Thermometry Concepts
Building upon the foundation of thermometer technology, Range, Speed and Type are important factors to consider when choosing a thermometer. Different thermometer technologies are more effective in certain situations based on what is being tested. For example, when testing the “doneness” of meat, an infrared thermometer will only give you a reading on surface temperature so a probe thermometer would be more applicable. Depending on the type of meat, a more accurate thermometer may be needed, this may require an instrument with a smaller temperature range in order to obtain a more precise reading.
Range
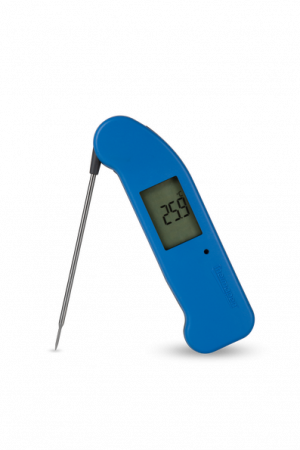
Range describes the upper and lower limits of a thermometer’s measurement scale. Some thermometers have a broad temperature range whereas others specialise within a particular environment (ie fridge/freezer) and will provide a more economical solution. Often a thermometer will have different accuracy and/or resolution specifications within their temperature range. For example, the new Thermapen Blue has an accuracy reading of ±0.4 between the temperature range of -49.9°C to 199.9°C, then ±1 thereafter. It is essential to read specification tables carefully, especially in cases where the probe and meter are separate.
Speed
Speed (aka Response Time) is an influential aspect when choosing a thermometer. Response time is affected by many factors such as; the sensor’s position relative to the substance being measured, the mass of the sensor itself, the speed of the processor, the length of the wiring between the sensor and the processor, and the type of technology used.
Some thermometer technologies are faster than others, for example, generally electronic thermometers are faster than mechanical thermometers (ie liquid mercury or dial thermometers) and thermocouple sensors are faster than resistance technologies (ie thermistor or RTD). Additionally, the closer sensor position and smaller mass of the reduced tip probes facilitates faster responsiveness than the standard-diameter probes.
Time Constant
In technical catalogues and websites, response time is often listed in increments called “time constants”. One time constant is the time it takes for a given instrument to reach 63% of the full reading. In order to obtain an accurate 100% practical equivalent, four more time constants are required (five time constants in total).
It is beneficial to determine if the advertised thermometer’s speed is measured per technical response time or a full-reading claim. For example, the ETI SuperFast Thermapen has a technical response time of 0.6 seconds, producing a full-reading response time of 3 seconds. Technical response times can be misleading being that the proclaimed response time of 3 seconds will in fact be a 15 second full-reading claim.
Reading Update Rate
The Reading Update Rate refers only to the frequency with which the digital processor of a thermometer samples the sensor. For example, the ETI SuperFast Thermapen has an update rate of 0.5 seconds which means the digital display will show changes in the temperature as measured by the sensor every half second. This number can be misleading as it has nothing to do with the speed with which the sensor will adjust to the temperature of the material being measured.
Variances
It is important to note that the real response time of a thermometer can vary depending on the particular substance and/or range of temperatures being measured. Specification tables give outside limits, not exact speeds.
The total response time may also be the collective of each individual component, ie, the meter response time plus the probe response time. Integrated systems like the SuperFast Thermapen and Food Check are often favoured because their listed response times are composite.
Thermometer Type
The five most common thermometer technologies are:
- Liquid expansion devices
- Bi-metallic devices
- Resistance temperature devices (RTD) and thermistors
- Thermocouples
- Infrared radiation devices
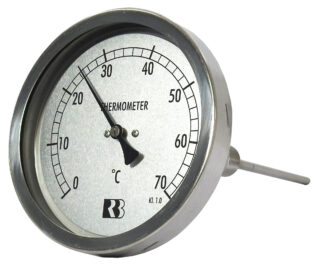
Bi-metals are mechanical thermometers that have a dial display. The dial is connected to a spring coil at the centre of the probe. The spring is made of two different types of metal that expand in different (but predictable) ways when exposed to heat. Heat expands the spring and pushes the needle on the dial. Despite being cheap, bi-metal thermometers generally take minutes to reach full temperature and require the entire metal coil to be immersed in the material being measured to get an accurate reading (usually more than an inch or two). They lose calibration very easily and need to be re-calibrated weekly or even daily using a simple screw that rewinds the metal coil.
Resistance Temperature devices (RTD’s and thermistors) measure the effects of heat on electric current. They take advantage of the fact that electrical resistance reacts to the changes in temperature along predictable curves. With thermistors, resistance decreases with temperature whereas resistance increases with temperature for RTD’s.
Commonly using platinum or metal films, RTD’s are very accurate and have a high repeatability. Thermistor elements are highly sensitive and commonly use ceramic beads as resistors. Thermistors are inexpensive and reliable but are not built for high temperatures.
Thermocouples work on the principle that when two different metals are connected across a span with a temperature difference, an electronic circuit is generated. A predictable voltage is generated within the thermocouple when the ends are maintained at different temperatures. The Hot Zone is the temperature measured by two common metals welded together at the tip of the thermometer probe. These common materials include nickel and chromium (Type K), copper and constantan (Type T) or iron and constantan (Type J). The thermocouple’s Cold Zone (reference point) where the two metal wires are open, is measured through either a cold junction (part of the circuit is brought to the ice point [0°C/32°F]) or an electronic cold junction compensation.
Thermocouples can detect temperatures across wide ranges and are typically very fast. They can be an all-in-one choice because they use interchangeable probes for different applications.
Additional Features
- Max/Min feature is particularly useful when determining if a target has been kept within the designated temperature boundaries over an extended period of time. The Max/Min functionality displays the highest and lowest temperatures encountered and allows the user to record and monitor the results. Please note: the electronic instruments with this feature do not have an auto-off feature as this would reset the Max/Min recordings.
- Hold allows you to freeze a displayed measurement (usually a digital reading) for later consultation.
- Differential Recordings (Diff) displays the range of deviation over a span of time by subtracting the minimum from the maximum recorded temperatures.
- Average temperature recordings (Avg) simply displays the calculated average temperature from all the individual measurements ascertained over a span of time.
- Hi/Lo feature enables you to predetermine a “safe” temperature range. The alarm is triggered when a measurement has gone above or below this preset temperature range. The alert can be in the form of a blinking light, beeping sound, email or text message.
- Auto-off is a feature designed to protect long-term battery life by automatically shutting the unit off after a set amount of time (some products will facilitate the option to disable this feature).
Thermometer TIps
Caring for your Thermapen
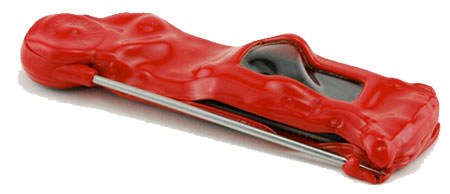
The SuperFast Thermapen is a popular digital food thermometer that is easy to use, clean and maintain. For best results, please see below tips on how to care for your digital thermometer:
1. Ensure the body of the Thermapen does not get too hot.
The “Golden Rule” is that the SuperFast Thermapen is very quick to measure temperature, if the heat is too high for your hand (without a protective mitt) it is most likely too hot for the Thermapen body.
- Never leave the Thermapen inside an oven, smoker, or microwave while cooking
- Do not leave it under heat lamps or on a hot surface (e.g. grill hood)
2. Temperatures above 300°C can cause internal damage to the probe
- Never put the Thermapen probe on a coal or into an open flame
- Be careful when closing the Thermapen probe after use, the probe is metal and may be very hot to the touch
3. A Silicone Boot will provide additional protection
- Silicone offers short-term protection from radiant or contact heat in high-heat environments
- Silicone will cushion the Thermapen from knocks and drops, even a drop onto concrete
- The boot fits snugly and is easy to remove for cleaning
4. Do NOT put your Thermapen in the dishwasher
- The SuperFast Thermapen is splash-proof/waterproof to IP66/67 and will resist exposure to wet hands and splashes from cooking liquids but cannot be submerged in water or any other liquid
Please Note: If submerged into a liquid, the probe hub being opened and closed during this can cause an ingress of water into the case.
5. Regularly clean your Thermapen
- Anti-bacterial Wipes are recommended to clean both the body and probe
- A simple soap solution / anti-bacterial spray cleaner and paper towel is also an effective cleaning tool
- The Thermapen’s ergonomic housing design is almost seamless with very few cracks or crevices where food can get caught and is very easy to clean
- Special care is advised when cleaning the rotating hub at the top of the Thermapen housing and the probe retention groove at the bottom
Please Note: Please do not submerge the Thermapen into water when cleaning. Exposure to cleaning chemicals and/or soaps can negatively affect water seals preventing waterproofness whilst cleaning.
6. Try to avoid getting moisture, flour, or oil in the rotating hub
- The Thermapen features an O-ring seal to prevent foreign materials entering the unit, however oils and fine powders can still work their way past the seal and accumulate over time causing problems with the electrical components
7. Avoid cross-contamination
- Each time meat is tested, the Thermapen probe may be exposed to harmful bacteria
- Wipe the Thermapen probe clean after every use
- The precautions taken when using a knife or cutting board should be applied to a thermometer probe
- Any non-tainting, anti-bacterial wipe or spray cleaner and paper towels can effectively sanitise the Thermapen probe tip
Caring for your Thermometer Probe
Thermometer temperature probes are precision measurement devices. There is an electronic sensor at the probe tip with wires running through the probe tube. With proper care, your probe will provide consistent accurate readings for a long time.
Avoid Damage:
- The probe is designed for liquids and semi-solid foods
- Do not ‘stab’ food, careful insertion will penetrate most food
- Avoid striking bones with the probe tip
- The probe shaft and tip should not be bent
- Do not lift heavy food items with the probe tip
- Do not use the probe as an ice pick
- • For frozen foods place the probe tip between two frozen packs or use a drill to make a hole in the food before placing the probe tip in the hole. Do not create a hole with the probe tip.
- • Do not use the probe to pry or puncture non-food items
- • Do not expose the probe tip to flames or temperatures beyond the probe temperature limit
- Do not expose the handle to high temperatures
- Do not coil the cable tightly around the handle
- Avoid excess heat that may melt the cable
- Avoid excess strain, crimping or stretching of the cable
- Do not lift the instrument by the probe or cable
- Keep the lead connector and instrument clean and dry
- When plugging the probe into the unit, avoid bending pins
- Do not immerse the probe handle in any liquid (except waterproof probes)
- Damage is not covered by the probe warranty
Cleaning:
- Use probe wipes to clean the probe after each food measurement to avoid cross-contamination, wiping both the handle and cable
- Other food-safe cleaning solutions may be used with paper towels in place of probe wipes
Accurate Use:
- For hot foods, find the coldest part of the food by placing the probe tip at the thickest part of the food
- For cold foods, find the warmest part of the food
- For accurate measurements avoid the sides of any container
How to get an Accurate Temperature Reading using your Thermapen
Thermocouple Technology
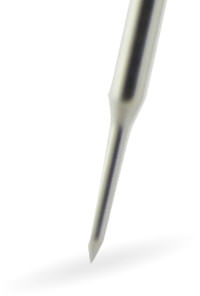
Typically only found in professional-grade thermometers, the Thermapen features a micro-thermocouple at the very tip of its probe shaft. A thermocouple is a set of two heat-sensitive wires that produce a voltage related to temperature difference. It is this key component that sets the Thermapen apart from other instant-read thermometers. The economical size of micro-thermocouple means the Thermapen only needs to be inserted by approximately 3mm to get an accurate reading (other cooking thermometers may need 12mm or more).
Achieving Accurate Temperature Readings
Taking a temperature reading with your Thermapen is as simple as placing the very tip of the probe in the area where a temperature measurement is needed. When testing doneness in foods it is recommended to test the middle of the thickest portion as generally, it will be the coldest part. Likewise, when chilling food, the thickest part’s centre will be the last portion to cool. With larger foods, compile readings from several locations to verify that the entire item is done. It is not uncommon for parts of a large roast or turkey to vary by as much as 10 to 15°C. Even a steak or a boneless chicken breast can show many degrees difference as the tip moves from the surface toward the centre, or from end to end.
To get a proper reading from the Thermapen, when inserting the probe tip into the thickest part of the meat, make an effort to avoid any obvious bone or gristle. Take note of the temperature. You will be able to watch in real-time the temperature changing depending on the depth of penetration. If the meat has already been cooked on both sides the temperature readings will start to increase when you continue to push past the middle of the thickest part showing exactly where the centre of the meat actually is. That is the best place to gauge doneness.
Experiment with your Thermapen and gain confidence in quickly and effectively obtaining accurate readings of your piece of meat, roast, or whole bird. For larger foods, remember to test in several places and depths to gauge overall progress during cooking. Lesser quality thermometers such as dial types or slower digitals may not show as much temperature difference due to lack of speed and sensitivity. For quick and accurate temperature readings you need a thermometer like the Thermapen that can show the exact temperature at its tip.
Food for thought: Many experts recommend inserting your thermometer probe from the side of a steak or patty to ensure that you get the probe tip right in the centre (where the temperature will be the lowest). You can use a pair of tongs to gently lift the piece of meat off the heat.

Customising your Thermapen
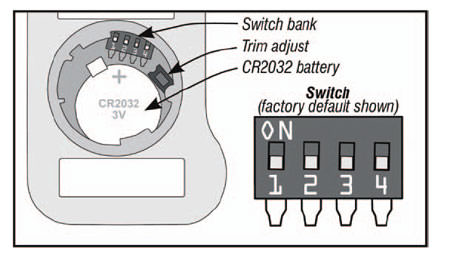
You can personalise your Thermapen by changing the following settings:
- Changing the display units ( °C / °F )
- Changing the display resolution ( 0.1° / 1° )
- Enable / Disable the auto off feature
To change your settings, open your compartment (see How to Change the Batteries) and, using the tip of a bent paper clip, flip the appropriate switch.
Switch 1: Display Units
The default factory setting for your Thermapen unit display is °C. To display °F, move Switch 1 to the “on” position (away from the batteries).
Switch 2: Resolution
The default factory setting for your Thermapen resolution display is to show temperatures at tenths of a degree (0.1°) for both °F and °C. To change to whole numbers (1°), move Switch 2 away from the batteries.
Switch 3: Disable Auto-off
The default factory setting for your Thermapen is with the auto-off feature enabled to preserve battery life. This means your Thermapen will turn itself off ten minutes after you extend the probe and turn it on. Once off, you will have to close the probe and extend it again to turn the Thermapen back on. To disable this auto-off feature while taking lengthy readings, move Switch 3 to the “on” position (away from the batteries) Please note: With auto-off disabled, your Thermapen will stay on and continue using battery power if you forget to close the probe.
Switch 4: Trim Adjust
This feature allows you to set an offset that will automatically add or subtract a number of degrees from your Thermapen readings. It should NOT be needed for normal use.
Changing the Batteries
How to change SuperFast Thermapen 3 Batteries
The Thermapen MK3 comes with two CR2032 (3V) coin batteries pre-installed, enough to power the Thermapen for about 1,500 hours!
An illuminated battery symbol will appear when it is time to change the batteries. The accuracy of your Thermapen will not be compromised, but the display will stop working when battery power is gone. Once the batteries are too low to power the display, the display will show “Flat Bat” and then shut off. Replace both batteries to continue using the Thermapen.
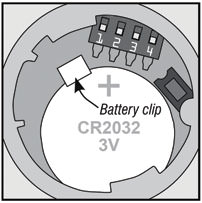
Start by carefully removing the battery cover. Insert a coin into the slot and using firm but even pressure, rotate the battery cover counter-clockwise about a quarter of an inch as marked on the bottom of the Thermapen 3 housing. Lift the cover from the hole with the edge of the coin or with your fingernail. Remove the old batteries and set both of the new ones in, one on top of the other, with the positive sides up.
Make sure that the metal clip provided snaps over the batteries to hold them in place. Carefully replace the battery cover.
Please Note: The battery cover may be tight in order to maintain splash resistance, but be careful not to over-rotate. The tabs that hold the battery cover in place are made of molded plastic and can break if forced
How to Change SuperFast Thermapen 4 Batteries
The Thermapen MK4 comes with one AAA (1.5V) battery pre-installed enough to power the Thermapen for about 3,000 hours without the backlight. A low battery symbol “ will appear when the battery needs replacing. In this condition, the backlight is automatically set to a low level to save battery life. The instrument continues to measure accurately but we recommend that the battery is changed as soon as possible.
To replace the battery, remove the battery cover with a pozi (PZ1) screwdriver. Remove the battery by pulling the battery retaining clip back (do not over extend). Replace the battery, positive end first before screwing the battery cover back down.
Please Note: Do not use excessive force when refitting the battery cover ensuring it is compressed against the seal.
Creating a Properly Made Ice Bath
The easiest way to test the accuracy of any thermometer is in a properly made ice bath. If done correctly, your ice bath (aka ice slurry) will be 0°C within ±0.1°C. If you are not careful, the ice bath can be off by several whole degrees (just a cup with ice water in it can be up to 12 or more degrees too high).
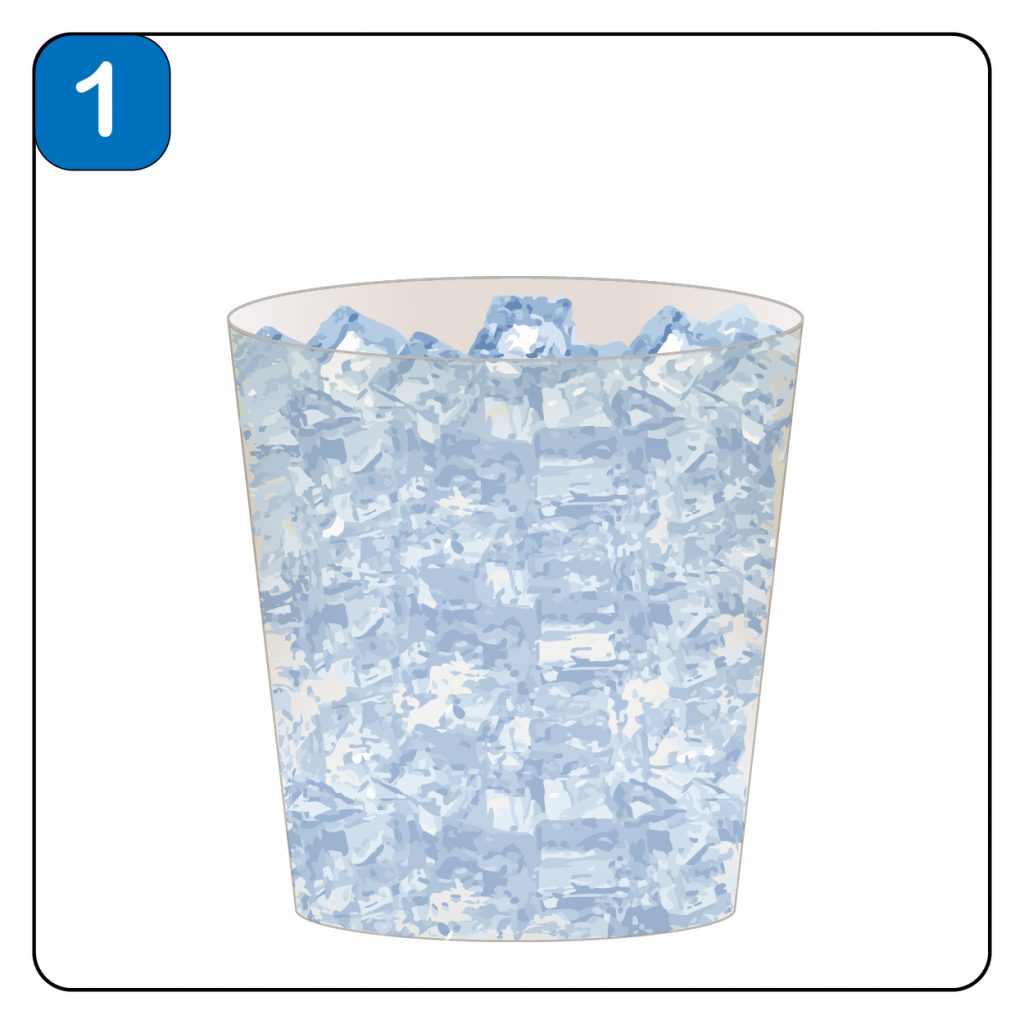
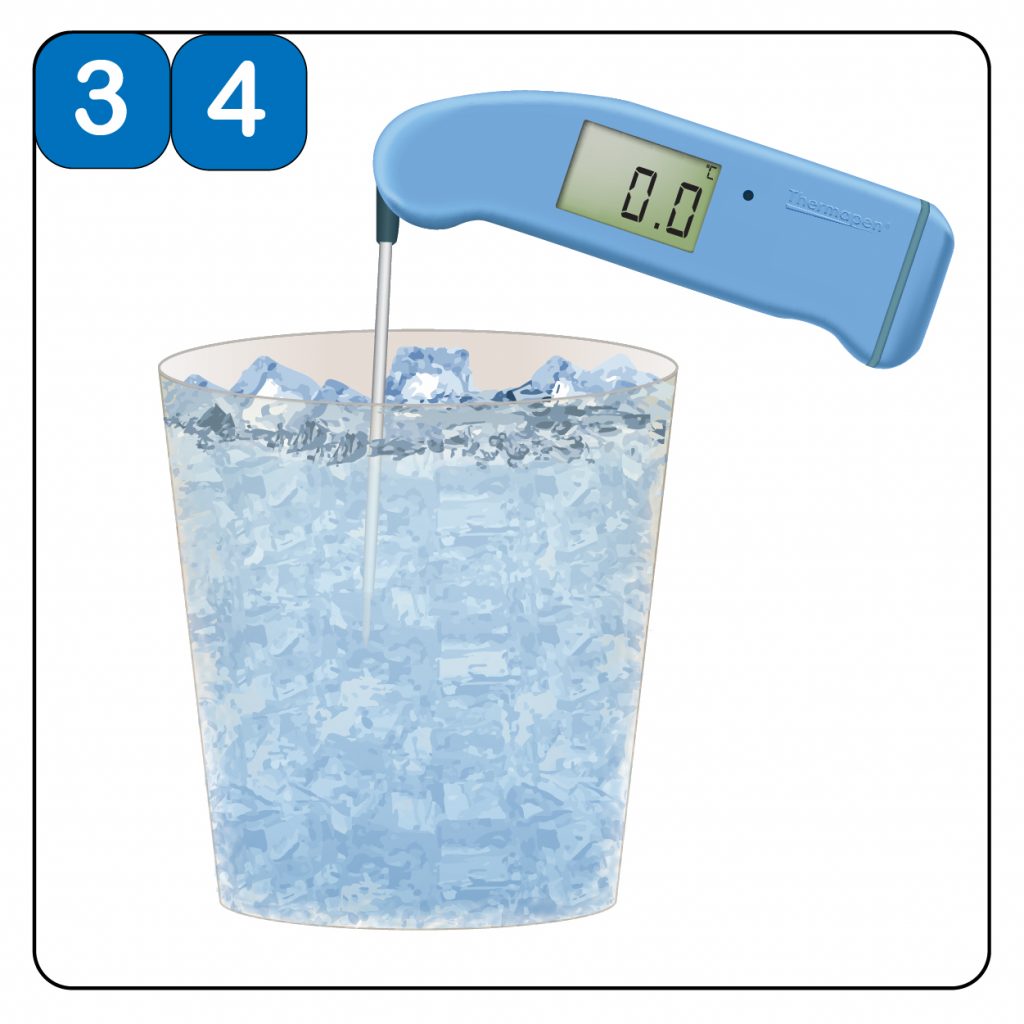
1. Fill with ice
The key factor in making a successful ice bath is keeping a proper ice-to-water ratio. Fill a container all the way to the top with ice. Crushed ice is preferred because there are fewer gaps between the ice, however cubed ice will also work fine.
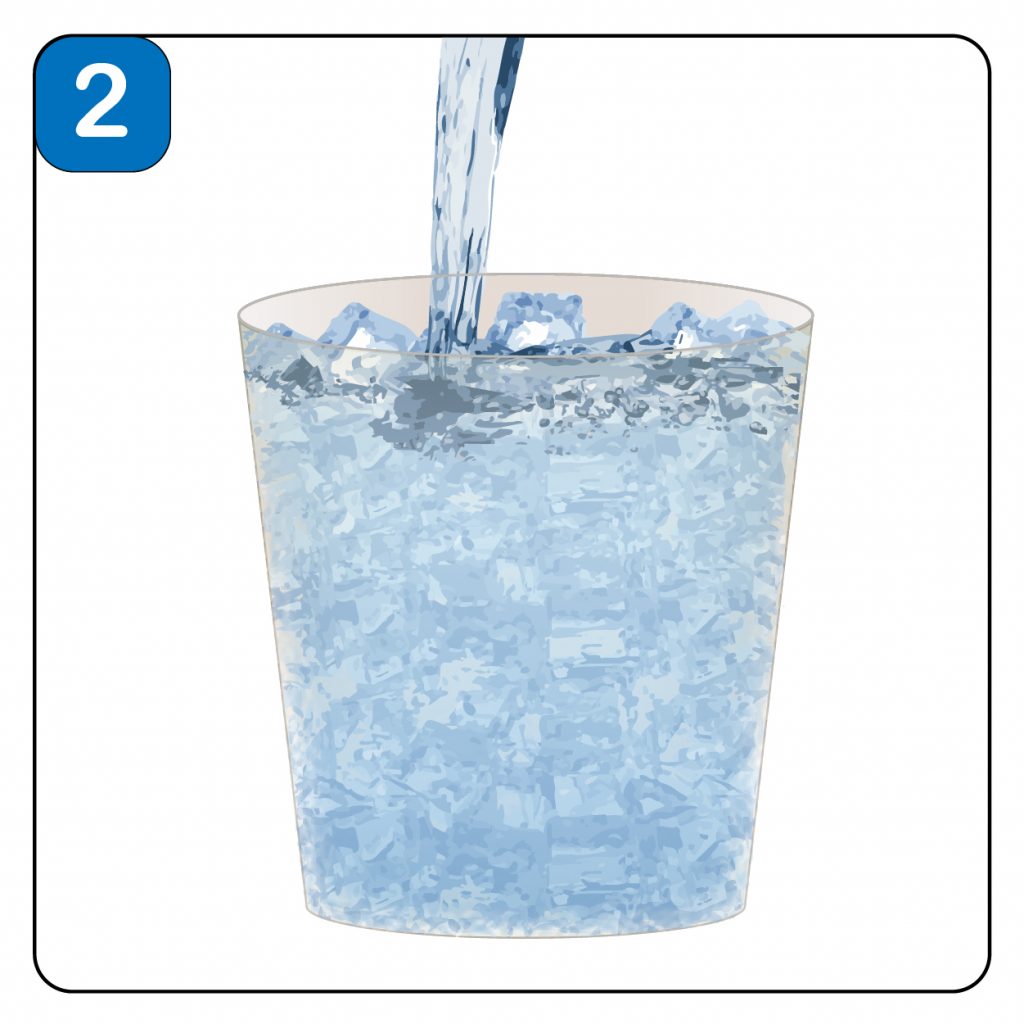
2. Add Water
Slowly add water to fill the spaces between the ice, stopping when the water reaches about 12mm (½”) below the top of the ice. Wait approximately two minutes to allow the temperature of the water to settle. IF you see the ice starting to float off the bottom of the container, pour off some water and add more ice. Any water below the ice will not be at 0°C.
3. Insert the Probe
Once the mixture has rested for a minute or two, insert your probe (or thermometer stem) into the mixture and continuously stir in the vertical centre of the ice slurry. Stirring equilibrates the temperature throughout the container and prevents the sensor from resting against an ice cube and affecting your reading. It is crucial to keep the probe tip from touching the side walls and against the bottom of the container. Doing so will give you inaccurate temperature readings.
NB: If the thermometer has an extremely fast and sensitive needle tip (eg SuperFast Thermapen) you MUST gently stir the probe or you will find colder and warmer spots in the ice bath.
4. Confirm Calibration
At this point your thermometer should read 0°C. If you are testing a dial thermometer, adjust the dial as directed by the manufacturer. For digital instant-read thermometers, check if the readings are within the manufacturers accuracy specifications (look for a ±°C on the documentation included with the instrument) before attempting adjustments. If it is within the specified tolerance, don’t adjust.
Temperature Display Fluctuates
If the Thermapen numbers are changing, the food’s temperature is changing!
Food temperature is very dynamic, particularly while it is cooking. A common misconception is that cooking thermometers should be like bathroom scales or speed guns and lock in on the temperature once it is detected. As food temperature changes, having that information instantly relayed can be considerably beneficial. The SuperFast Thermapen is fast and accurate enough to display minute changes in the temperature as it occurs.
It can take 2 or 3 seconds for the Thermapen to move from the ambient temperature (room temperature) to the temperature of a food or liquid. Once established though, its micro-thermocouple is very quick to sense and display the constant temperature changes (the display refreshes every half-second).
Of course, these minor changes can be hidden by changing the display resolution of the Thermapen from tenths to whole numbers (see Customising Your Thermapen). Whole numbers can be very comforting.
Choosing An Infrared Thermometer
- Fragile (computer circuitry)
- Dangerous (gears, molten metal)
- Impenetrable (frozen foods)
- Liable to contaminate (foods, saline solution)
- Moving (conveyor belt, living organisms)
- Out of reach (air conditioning ducts, ear drums)
| Infrared Lens | Cost | Durability | Temp Range | Optics | Ambient Effect |
|---|---|---|---|---|---|
| No Lens | $ | ‡‡‡ | Hot | Good | ‡‡‡ |
| Fresnel Lens | $$ | ‡‡ | Hotter | Better | ‡ |
| Mica Lens | $$$ | ‡ | Hottest | Best | ‡‡ |
An infrared reading is determined by the calculated average temperature within the full field of view. When choosing an Infrared Thermometer it is important to consider the anticipated temperature range you require as well as the environment and surface type of the selected target. It’s ideal to use a thermometer with a specified range that most narrowly covers what you are planning to measure.
It is a valuable approach to regularly clean and calibrate your Infrared Thermometer in order to sustain accurate readings from your device.
Infrared Thermometer Limitations
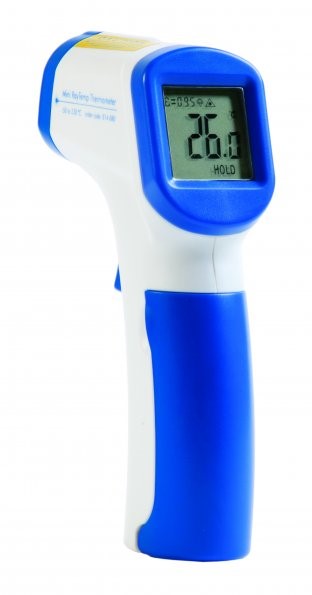
- Only measures surface temperatures, NOT the internal temperature of food or other materials
- Requires adjustments depending on the surface being measured
- Can be temporarily affected by frost, moisture, dust, fog, smoke or other particles in the air
- Can be temporarily affected by rapid changes in ambient temperature
- Can be temporarily affected by proximity to a radio frequency with an electromagnetic field strength of three volts per meter or greater
- Does not see through glass, liquids or other transparent surfaces regardless if visible light passes through them (ie, if you point an IR gun at a window, you’ll be measuring the temperature of the window pane, not the outside temperature)
No Lens Thermometers
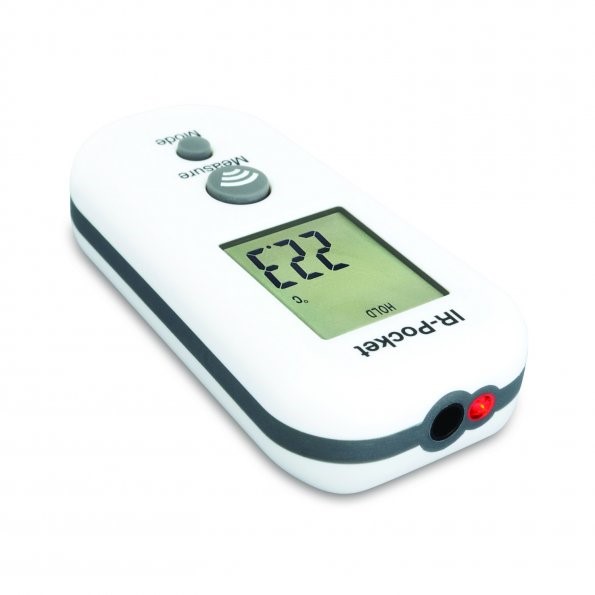
- Typically cheaper
- Higher durability
- Generally smaller and easier to handle than other types of Infrared Thermometers
- Most accurate in cold spaces
Mica Lens Thermometers
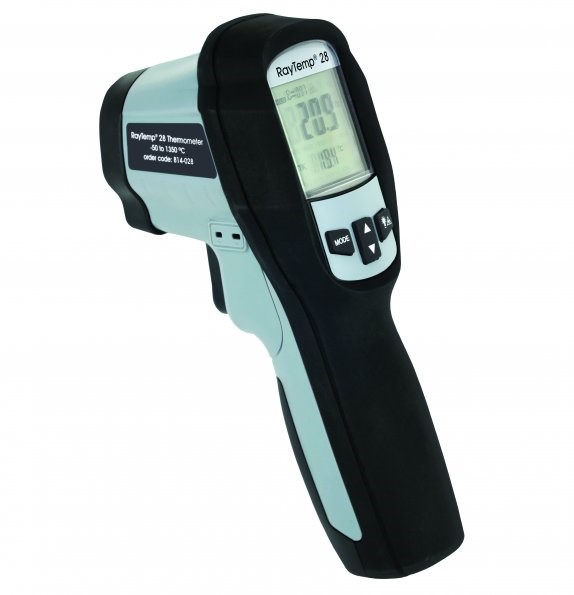
Mica lens thermometers have more rigid mineral-based ground lenses and are the most common type used in industrial settings.
Advantages:
- Take accurate measurements at much higher temperatures (above 1,000°C)
- Roughly half as susceptible than Fresnel lens thermometers to the thermal shock effects caused by sudden swings in ambient temperature
- Most accurate at greater distances (DTR above 20:1)
Mica lens thermometers generally come with one or two laser guides to assist in both the aiming of the thermometer and the estimation of the field of view being measured. This type of thermometer is the most fragile and likely to crack or break when dropped so are often supplied with a carrying case. Typically the most expensive, these units also require approximately 10 minutes to acclimate when providing accurate readings in extreme ambient temperatures.
Mica Lens Products: RayTemp 28, RayTemp 38
Fresnel Lens Thermometers
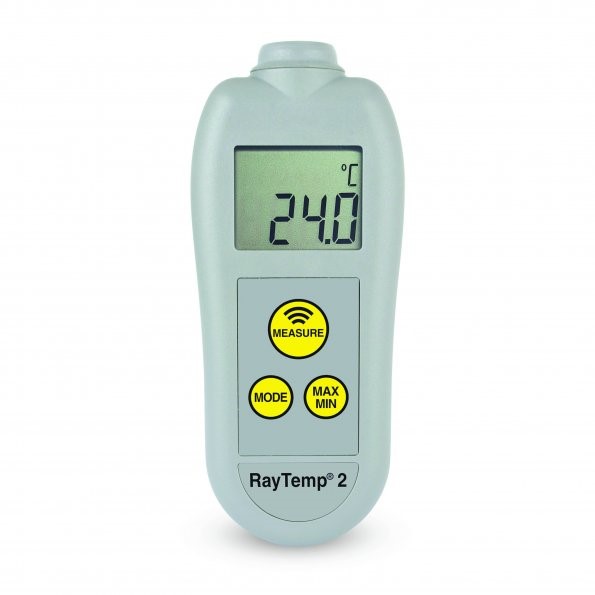
- Less expensive than mica lens thermometers
- More durable than mica lens thermometers
- Can offer tight spot diameters at a greater distance than no lens thermometers
- Typically more accurate at a 6” to 12” distance than other technologies
Cleaning and Caring for Your Thermometer
It is vital to ensure your Infrared Thermometer remains free of dirt, dust, moisture, fog, smoke and debris. If your device is exposed to any of these conditions it can affect its accuracy and will need to be suitably cleaned. Regular cleaning every six months or so will facilitate the ongoing efficiency of the unit with particular care to keep the infrared lens or opening clean and free of debris.
To clean your infrared thermometer:
- Use a soft cloth or cotton swab with water or medical alcohol (never use soap or chemicals)
- Carefully wipe the lens and then the body of the thermometer
- Allow the lens to dry fully before using the thermometer
Never submerge any part of your infrared thermometer!
Store your thermometer between 4-65°C and protect it from extreme temperatures while in storage
Calibrating an Infrared Thermometer
Infrared Thermometers can be calibrated for accuracy just like any other thermometer. In Ross Brown Sales’ Laboratory, using industrial black bodies, our technicians calibrate infrared thermometers within Australian Standards and include a 12 month traceable certificate.
Black bodies have approximate zero reflected ambient radiation and therefore unimpeded emission of infrared energy for a given emissivity value, typically 0.95. Without having access to a black body, a simple, inexpensive Infrared Comparator Cup is the next best thing. If neither option is available, a quick calibration using an ice bath is achievable.
Using a boiling point for calibration is problematic (more so with an infrared), factoring in variables in air pressure and elevation, as well as the steam generated by boiling. That steam and the evaporative cooling and condensation makes it difficult to obtain an accurate infrared measurement of a boiling liquid. The surface of a properly made ice bath is a reliable 0°C and is therefore the preferable method.
Infrared Thermometer Tips
Angle of Measurement
Always try to hold the lens or opening of your infrared thermometer directly perpendicular to the surface being measured. This produces a tight circle of surface measurement and will convey the most accurate readings. Holding your infrared thermometer at an angle relative to the surface being measured will result in an elliptical reading area which is harder to control.
Spot Size
Two variables control the “spot size” of any given measurement:
- The distance to target ratio of your particular infrared thermometer
- The distance between your infrared thermometer and the target
The distance to target ratio (DTR) is generally listed on the thermometer itself. It defines the diameter (circle) size of the surface area that will be measured. For example, an infrared thermometer with a 12:1 ratio will measure the temperature of a 1” diameter circle of surface area from 12” away, a 2” diameter circle of surface area from 24” away, and so on.
NB: In the case of an infrared thermometer DTR 1:1 or less, it should be held as close to the target as possible
For each and every measurement, it is important to either physically measure or estimate your distance from the target and the proportionate spot size. Some infrared thermometers come with laser guides to assist in gauging the distance. If you are too far back from your target, background elements may be subsequently encompassed in your measured surface area and can affect your reading.
Large holes like a grate or a grill can also affect the accuracy of your reading because the infrared thermometer will factor in the surface temp of the holes’ visible surfaces. To measure this type of surface successfully, first place a solid surface (eg, iron plate / pan) on the grate or grill and allow time for it to come to temperature. Then measure the solid surface for an accurate temperature reading.
Using Infrared Thermometer Laser Guides
Laser guides on an Infrared Thermometer help to gauge the size, or location, of the area being measured. The location of the lasers and their relativity to the area being measured can vary by unit. With this in mind, to use the infrared thermometer effectively, further familiarisation of the unit’s specifications and hands on experience is recommended.
Infrared thermometers with laser guides can mostly be divided into two groups:
- Single laser
- Multiple (two or more) lasers
Single laser units assist with aim and control (more precisely, the location being measured) particularly when taking measurements from far away. The laser guide can indicate the top, centre, middle or sides of the circle of surface diameter. It is also possible that the position of the laser point, relative to the circle of measurement, will change depending on the distance from the target (known as Optical Range). For more information, please refer to your user guide.
Multiple laser units generally offer a better indication of the spot size. Infrared thermometers with a small spot size and low distance to ratio can also benefit with effective and accurate results. Indicators can frequently cross each other and be affected when specified distances from the IR gun are reached.
Emissivity and Infrared
The emissivity value varies depending on the material being tested. Emissivity is the term used to describe the measurement of a material’s ability to emit radiating/infrared energy. Measuring from 0.00 to 1.00, the higher the emissivity value, the more efficient the radiating energy of the material is. It is recommended to calibrate your instrument using a material with 1.00 (100%) emissivity value also known as a black body. This is because a black body absorbs all reflective/ambient infrared energy and only emits its own infrared radiation.
Organic materials such as plants and animals generally have an emissivity rating of 0.95 whereas highly polished metals tend to be very reflective and subsequently provide a low emissivity value. With low emissivity materials energy is reflected not absorbed, for example, a reading from a stainless steel pot filled with boiling water will more likely be closer to 38°C than 100°C because the pot is reflecting the room’s radiation more effectively than emitting its own energy.
Fixed Emissivity
Some infrared thermometers are equipped with a fixed emissivity value (usually 0.95 or 0.97) to facilitate a more user friendly instrument while maintaining adequate readings for most material surfaces, including almost all foods. Other infrared thermometers offer adjustable emissivity settings in order to accurately set values and achieve accurate readings on low emissivity materials, particularly non-organic surfaces.
Fixed Emissivity: Mini RayTemp, RayTemp 2
Calculating Emissivity Values
Adjustable emissivity settings on your infrared thermometer allow you to counter the emissivity value of the material being tested to achieve more accurate readings. Please see Ross Brown Sales’ Emissivity Table for a list of estimated emissivity ratings of the most common materials. Obtaining a precise accuracy of your particular material may need additional verification as the emissivity can be affected by colour, thickness and even its temperature.
Materials with low emissivity are counterbalanced by your infrared thermometer amplifying the infrared radiation levels they detect when performing calculations. This can lead to the magnification of slight errors, making your measurements seem erratic.
Methods to verify accuracy of readings:
- Use a surface probe and meter to help pinpoint the proper emissivity setting for your infrared thermometer
- Use a high-emissivity patch between the target surface and the infrared thermometer
Using a surface Probe and meter
Take a surface reading with your surface probe and meter and document the temperature reading. Then, using a chart value as a starting point, adjust the emissivity setting on your infrared thermometer up and down until the temperature reading on your infrared thermometer matches the temperature recorded by the surface probe and meter.
You can now be confident that other measurements taken with that same infrared thermometer on that same surface material in the same general temperature range will be accurate.
Two-in-one infrared thermometers such as the RayTemp 8 are particularly useful because they have a type K socket that enables a wide range of air, liquid and surface temperature probes to be attached. This allows you to verify the accuracy of your infrared readings without the need of an additional device.
Using a high-emissivity patch
Put a patch of high emissivity material over the low emissivity (eg, reflective) material and allow it to come to temperature. For example, cover a polished metal skillet with a layer of cooking oil (.95 emissivity) and allow the oil to become the equivalent temperature of the skillet before taking an accurate temperature reading of the oil.
Another way to create a patch is to spray a spot with flat black paint or by applying a few pieces of black electrical tape (.95 emissivity). As well as waiting for the patch to be the equivalent temperature, it is important to ensure that the field of view does not extend beyond the patch or your reading will become skewed by the surrounding reflective metal.
This method can also be beneficial when using a fixed emissivity infrared thermometer on non-organic surfaces.
Emissivity Table
| Material | Emissivity Value |
|---|---|
| Aluminium: anodised | 0.77 |
| Aluminium: polished | 0.05 |
| Asbestos: board | 0.96 |
| Asbestos: fabric | 0.78 |
| Asbestos: paper | 0.93 |
| Asbestos: slate | 0.96 |
| Brass: highly polished | 0.03 |
| Brass: oxidized | 0.61 |
| Brick: common | .81-.86 |
| Brick: common, red | 0.93 |
| Brick: facing, red | 0.92 |
| Brick: fireclay | 0.75 |
| Brick: masonry | 0.94 |
| Brick: red | 0.9 |
| Carbon: candle soot | 0.95 |
| Carbon: graphite, filed surface | 0.98 |
| Carbon: purified | 0.8 |
| Cement: | 0.54 |
| Charcoal: powder | 0.96 |
| Chipboard: untreated | 0.9 |
| Chromium: polished | 0.1 |
| Clay: fired | 0.91 |
| Concrete | 0.92 |
| Concrete: dry | 0.95 |
| Concrete: rough | .92-.97 |
| Copper: polished | 0.05 |
| Copper: oxidized | 0.65 |
| Enamel: lacquer | 0.9 |
| Fabric: Hessian, green | 0.88 |
| Fabric: Hessian, uncoloured | 0.87 |
| Fibreglass | 0.75 |
| Fibre board: porous, untreated | 0.85 |
| Fibre board: hard, untreated | 0.85 |
| Filler: white | 0.88 |
| Firebrick | 0.68 |
| Formica | 0.94 |
| Galvanized Pipe | 0.46 |
| Glass | 0.92 |
| Glass: chemical ware (partly transparent) | 0.97 |
| Glass: frosted | 0.96 |
| Glass: frosted | 0.7 |
| Glass: polished plate | 0.94 |
| Granite: natural surface | 0.96 |
| Graphite: powder | 0.97 |
| Gravel | 0.28 |
| Gypsum | 0.08 |
| Hardwood: across grain | 0.82 |
| Hardwood: along grain | .68-.73 |
| Ice | 0.97 |
| Iron: heavily rusted | .91-.96 |
| Lacquer: bakelite | 0.93 |
| Lacquer: dull black | 0.97 |
| Lampblack | 0.96 |
| Limestone: natural surface | 0.96 |
| Mortar | 0.87 |
| Mortar: dry | 0.94 |
| P.V.C. | .91-.93 |
| Paint: 3M, black velvet coating 9560 series optical black | @1.00 |
| Paint: aluminium | 0.45 |
| Paint, oil: average of 16 colours | 0.94 |
| Paint: oil, black, flat | 0.94 |
| Paint: oil, black, gloss | 0.92 |
| Paint: oil, grey, flat | 0.97 |
| Material | Emissivity Value |
|---|---|
| Paint: oil, grey, gloss | 0.94 |
| Paint: oil, various colours | 0.94 |
| Paint: plastic, black | 0.95 |
| Paint: plastic, white | 0.84 |
| Paper: black | 0.9 |
| Paper: black, dull | 0.94 |
| Paper: black, shiny | 0.9 |
| Paper: cardboard box | 0.81 |
| Paper: green | 0.85 |
| Paper: red | 0.76 |
| Paper: white | 0.68 |
| Paper: white bond | 0.93 |
| Paper: yellow | 0.72 |
| Paper: tar | 0.92 |
| Pipes: glazed | 0.83 |
| Plaster | .86-.90 |
| Plaster: rough coat | 0.91 |
| Plasterboard: untreated | 0.9 |
| Plastic: acrylic, clear | 0.94 |
| Plastic: black | 0.95 |
| Plastic: white | 0.84 |
| Plastic paper: red | 0.94 |
| Plastic paper: white | 0.84 |
| Plexiglass: Perpex | 0.86 |
| Plywood | .83-.98 |
| Plywood: commercial, smooth finish, dry | 0.82 |
| Plywood: untreated | 0.83 |
| Polypropylene | 0.97 |
| Porcelain: glazed | 0.92 |
| Quartz | 0.93 |
| Redwood: wrought, untreated | 0.83 |
| Redwood: unwrought, untreated | 0.84 |
| Rubber | 0.95 |
| Rubber: stopper, black | 0.97 |
| Sand | 0.9 |
| Skin, human | 0.98 |
| Snow | 0.8 |
| Soil: dry | 0.92 |
| Soil: frozen | 0.93 |
| Soil: saturated with water | 0.95 |
| Stainless Steel | 0.59 |
| Stainless Plate | 0.34 |
| Steel: galvanized | 0.28 |
| Steel: rolled freshly | 0.24 |
| Styrofoam: insulation | 0.6 |
| Tape: electrical, insulating, black | 0.97 |
| Tape: masking | 0.92 |
| Tile: floor, asbestos | 0.94 |
| Tile: glazed | 0.94 |
| Tin: burnished | 0.05 |
| Tin: commercial tin-plated sheet iron | 0.06 |
| Varnish: flat | 0.93 |
| Wallpaper: slight pattern, light grey | 0.85 |
| Wallpaper: slight pattern, red | 0.9 |
| Water: | 0.95 |
| Water: distilled | 0.95 |
| Water: ice, smooth | 0.96 |
| Water: frost crystals | 0.98 |
| Water: snow | 0.85 |
| Wood: planed | 0.9 |
| Wood: panelling, light finish | 0.87 |
| Wood: spruce, polished, dry | 0.86 |
Infrared Thermometer’s Additional Features
- The max/min feature displays the maximum or minimum temperature recorded during any given measurement. This particular feature works best when sweeping the thermometer’s field of view across a range of targets to see the variance. The recorded temperatures often reset each time the thermometer’s measurement trigger is pressed. Please check your infrared thermometer’s user guide for more information.
- The Avg functionality displays the average temperature recorded during a given measurement
- Dif displays the difference between the highest and lowest temperature recorded
- Adjustable Hi/Lo Alarms will flash or beep when a recorded measurement goes above or below the designated temperatures
How to Calibrate an Infrared Thermometer with an Ice Bath
Constructing an Ice Bath:
- Fill a large glass to the very top with ice (crushed ice is preferred but not required)
- Slowly add very cold water until the water reaches about ½” / 1cm below the top of the ice Note: If the ice floats up off the very bottom of the glass at all, the ice bath will likely be warmer than 0.0°C
- Gently stir the ice mixture and let it sit for a minute or two
Testing your Infrared Thermometer:
- Make sure your infrared thermometer is set to an emissivity setting of 0.95 or 0.97
- Hold your infrared thermometer so that the lens or opening is directly above and perpendicular to the surface of the ice bath
Note: If you hold your infrared thermometer too far from the surface of the ice bath or hold it at an angle, your measurement will include the sides of the glass or container or even the table it is resting on and give you an inaccurate reading
- Taking extra care to ensure that the field of view (the size and shape of surface area being measured) is well inside the sides of the glass or container, press the button on your infrared thermometer to take a measurement
If you perform the test correctly, and your infrared thermometer is properly calibrated, it should read within your unit’s stated accuracy specification of 0.0°C.
Infrared thermometers cannot typically be calibrated at home, but they are known for their low drift. If the results of your ice bath test are within your unit’s manufacturer’s listed specification, you are good to go. If, however, you get a result that is outside the listed accuracy specification, you should contact the manufacturer.
